Getting Started
Installation for CLI Usage
Install mosaic-library via pip install mosaic-library[opencv].
Run mosaicking-mosaic -h or mosaicking-calibration -h for supported CLI scripts.
Installation for Developers / Integrators
We recommend using an Integrated Development Environment, such as PyCharm Community or Visual Studio Code. See this tutorial for setting up a PyCharm project.
For implementing mosaic-library with your own OpenCV build: pip install mosaic-library
For a pre-baked OpenCV backend: pip install mosaic-library[opencv]
If you want a supported OpenCV build, you can build one of the docker stages available on the repository. Three versions of the opencv build are currently available.
OpenCV CUDA
OpenCV CUDA + CUDACODEC
OpenCV CUDA + CUDACODEC + NONFREE
See the building with docker guide for further information.
CLI Usage Examples
The examples here use data available on the repository.
A simple sequential model can be applied via mosaicking-mosaic:
# Run a basic mosaic on 1 s of test data
# output to ./fishes_out folder
mosaicking-mosaic data/mosaicking/fishes.mp4 fishes_output --finish-frame 60
To see the full help documentation:
mosaicking-mosaic -h
usage: mosaicking-mosaic [-h] [--overwrite] [--force-cpu] [--force-cuda-off] [--force-cudacodec-off]
                         [--start-time-secs START | --start-frame START | --start-playtime START]
                         [--finish-time-secs FINISH_TIME_SECS | --finish-frame FINISH_FRAME | --finish-playtime FINISH_PLAYTIME]
                         [--frame-skip FRAME_SKIP] [-c CALIBRATION] [--orientation-path ORIENTATION_PATH]
                         [--orientation-time-offset ORIENTATION_TIME_OFFSET]
                         [--feature-types {ORB,SIFT,SURF,BRISK,KAZE,AKAZE,ALL} [{ORB,SIFT,SURF,BRISK,KAZE,AKAZE,ALL} ...]]
                         [--bovw-clusters BOVW_CLUSTERS] [--bovw-batchsize BOVW_BATCHSIZE] [--nn-top-k NN_TOP_K]
                         [--min-matches MIN_MATCHES] [--min-features MIN_FEATURES] [--homography-type {partial,affine,perspective}]
                         [--epsilon EPSILON] [--min-sequence-length MIN_SEQUENCE_LENGTH] [--tile-size TILE_SIZE] [--alpha ALPHA]
                         [--keypoint-roi]
                         video project

positional arguments:
  video                 Path to video file.
  project               Path to directory where output mosaics are to be saved.

options:
  -h, --help            show this help message and exit
  --overwrite           Overwrite existing database entries.
  --force-cpu           Disable GPU operations.
  --force-cuda-off      Disable CUDA operations.
  --force-cudacodec-off
                        Disable CUDA codec operations.

Video Player Params:
  --start-time-secs START
                        Time (secs) to start from.
  --start-frame START   Frame number to start from.
  --start-playtime START
                        Playback time HH:MM:SS to start from.
  --finish-time-secs FINISH_TIME_SECS
                        Time (secs) to finish at.
  --finish-frame FINISH_FRAME
                        Frame number to finish at.
  --finish-playtime FINISH_PLAYTIME
                        Playback time HH:MM:SS to finish at.
  --frame-skip FRAME_SKIP
                        Number of frames to skip in video player.

Preprocessing Params:
  -c CALIBRATION, --calibration CALIBRATION
                        Path to calibration file, overrides --intrinsic and --distortion.

Stabilization Params:
  --orientation-path ORIENTATION_PATH
                        Path to .csv file containing timestamped orientation measurements that transform world to the camera frame.
  --orientation-time-offset ORIENTATION_TIME_OFFSET
                        Timestamp (secs) referenced to timestamp in orientation file wherevideo starts (00:00:00).

Feature Extraction Params:
  --feature-types {ORB,SIFT,SURF,BRISK,KAZE,AKAZE,ALL} [{ORB,SIFT,SURF,BRISK,KAZE,AKAZE,ALL} ...]
                        Set of features to use in registration.
  --bovw-clusters BOVW_CLUSTERS
                        Number of bovw clusters to use in global feature descriptor.
  --bovw-batchsize BOVW_BATCHSIZE
                        Batch size for bovw clustering.
  --nn-top-k NN_TOP_K   Number of nearest neighbors to search for in global feature matching.

Registration Params:
  --min-matches MIN_MATCHES
                        Minimum number of matches to proceed with registration.
  --min-features MIN_FEATURES
                        Minimum number of features to detect in an image.
  --homography-type {partial,affine,perspective}
                        Type of 2D homography estimation to perform.
  --epsilon EPSILON     Homography determinant must be greater than this value to be considered valid.

Mosaic Params:
  --min-sequence-length MIN_SEQUENCE_LENGTH
                        Minimum length of sequence to mosaic.
  --tile-size TILE_SIZE
                        Largest allowable size (width or height) for mosaic tile. Creates a new tile if it gets bigger.
  --alpha ALPHA         Alpha blending scalar for merging new frames into mosaic. Default behaviour is to preserve existing canvas
                        and append only new area.
  --keypoint-roi        Only allow the convex hull of the inlier keypoints to be used in mosaic.
Program Integration Examples
Apart from the API, we have some examples providing implementations of some or all features of mosaic-library. You can find the examples here,
Primers and Exercises
Preprocessing Images
Images are essentially 3-Dimensional Tensors (Videos are 4-Dimensional),
and so typical linear algebraic operations (matrix multiplication,
inversion, etc.) will work on them. Images can appear faded or have
low-contrast due to underwater effects. Histogramming techniques can
balance the color intensity between channels (color fixing), balance the
overall light intensity of the image, or balance the contrast of the
image. Additionally, a sharpness filter
cv2.detailEnhance
has been exposed in mosaicking.preprocessing.enhance_detail
Several of the functions available in mosaicking.preprocessing have been
implemented in
preprocessing-playground.py.
Simply run
python3 preprocessing-playground.py path/to/your/image.jpg
to get started.
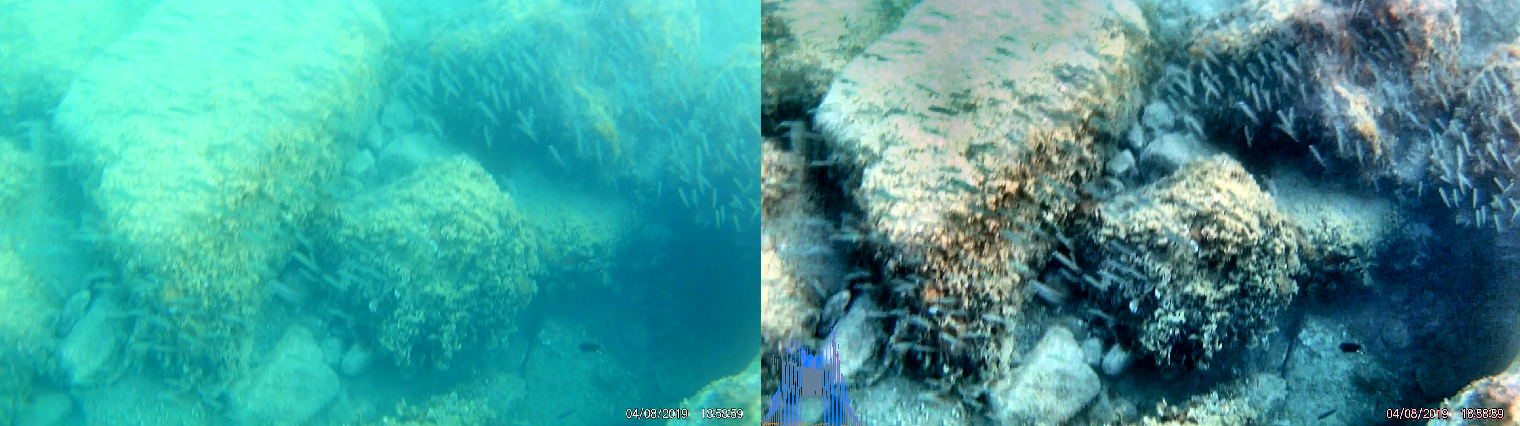
Result of preprocessing
Transforming Images
Applying geometric transformations to images is relatively easy. A rotation matrix, R, that specifies the Euler roll, pitch, and yaw angles can rotate an image about its optical center in sequence to appear as if looked at from an equivalent camera from a different orientation. The homography transformation of a calibrated image undergoing pure rotation is as follows:
This is useful for projecting an image onto a desired plane (such as a ground plane). Additionally, translation transformations can be applied to the image. This, in combination with rotation, can align images taken at different positions. In both situations it is essential to know the intrinsic properties of the camera and lens in order to correct for changes in perspective. If we have some idea of where the camera is relative to the image, then we can warp the image by rotating it about the approximate camera position.
The perspective-playground.py
example investigates and applies extrinsic and intrinsic transformations
to the image. See if you can make the train tracks appear parallel. Run
the program with
python3 examples/perspective-playground.py path/to/your/image.jpg. To
exit, press ESC or close the window.
Some questions:
Why do the rails appear to vanish to a single point in the original image?
What are we doing with the camera when we shift the perspective like this?
What is lost when we adjust the camera to make the rails parallel?
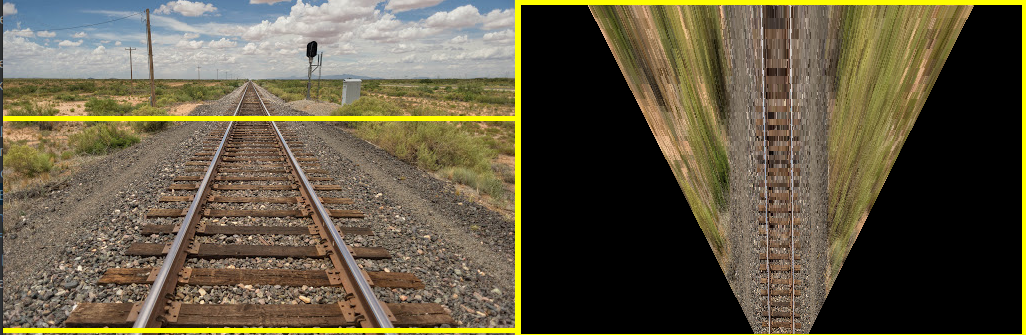
Example rail homography
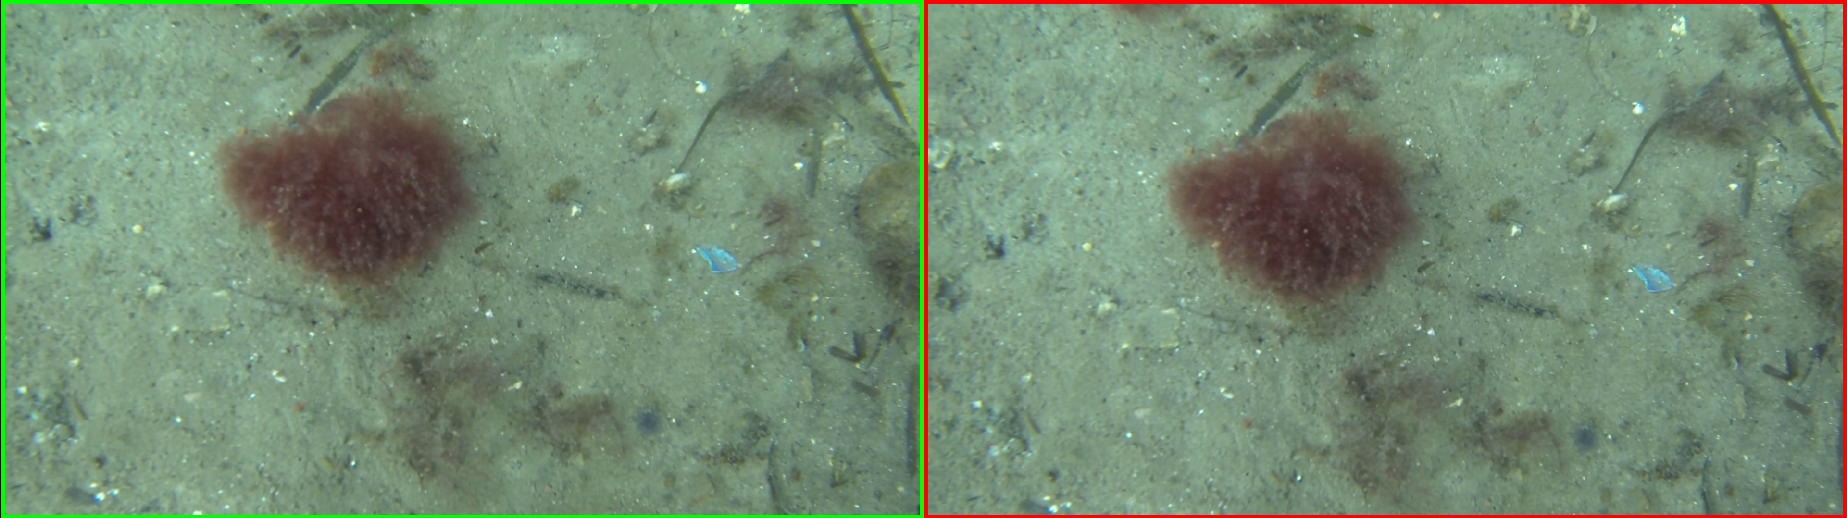
Registration
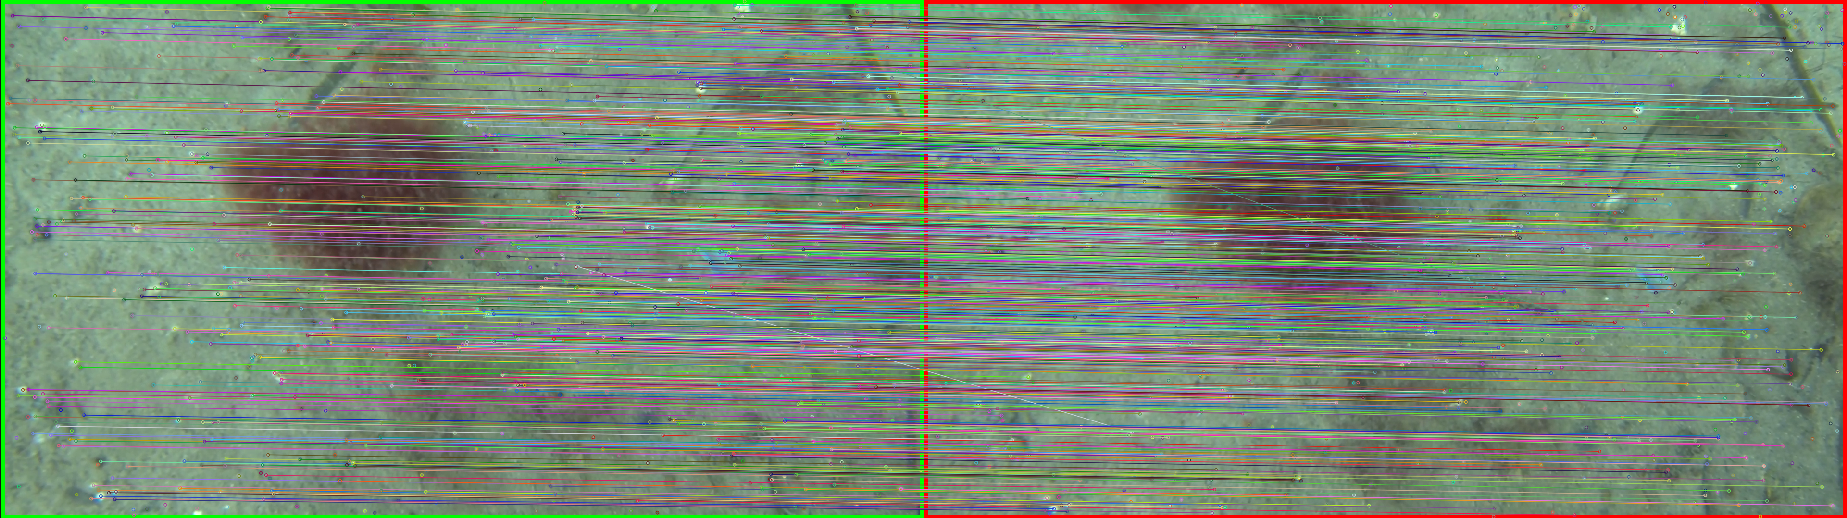
The process of identifying common features in two or more images and then estimating transformations to align them is called “registration”. Registration involves three major steps:
Feature detection: use an algorithm (such as ORB or SIFT) to detect and compute features in each image.
Feature matching: use a matching algorithm to identify features from each image that are sufficiently similar to each other.
Transformation estimation: use a linear transformation model (such as affine or perspective homography), and search through model parameters that sufficiently explain the transformation of matched features in one image to the matched features in the second.
registration-playground.py
performs these steps using functions defined in
mosaicking.registration. Run the
program like so
python examples/registration-playground.py path/to/image1.png path/to/image2.png.
Mosaicking
Mosaicking is the process of finding correspondences between images and arranging them so that they create a larger image. Videos or sequences of images can be used to incrementally expand a mosaic by adding in new tiles with each new frame. The images are preprocessed first to increase clarity and sharpness (making it easier to find features), then a transformation is computed between the existing mosaic and the new image that maximises correlation between the matched features. Then similarity, affine or perspective transformations (similar to the train example) are applied to the image. These steps are iterated over each new image, and the mosaic grows.
The mosaicking script has been exposed as a command (make sure you have it added to your path) as well as through the module.
It is important the camera’s view is mostly occupied by a scene that lies on a plane or where the distance of the camera to the scene is much greater than the relative distances of the objects in the scene (such as satellite imagery and the seabottom). Being too close to a bumpy bottom will introduce significant parallax error that will affect the registration of the mosaic.
Control of the camera to keep the ground plane in sight is essential as the new image will become smaller and smaller with respect to the mosaic as the camera moves “through” or “out of” the mosaic’s image plane. This will cause out-of-plane shrinking or growing of the mosaic. In this case, you should either carefully select the reference image (i.e. the geometric center of the mosaic) to be from a camera whose pose is as perpendicular to the ground plane as possible (i.e. the image plane and ground plane are parallel).
Alternatively, if you have an IMU that measures the camera frame relative to a ground plane (such as the North- East plane within a North-East-Down coordinate system), then you can specify the rotation required to align the camera with with this frame. This is the equivalent of expressing the inertial frame as a rotation from the camera frame. In this case, it doubly important to keep the ground plane as completely in-view as possible to reduce excessive perspective warping.
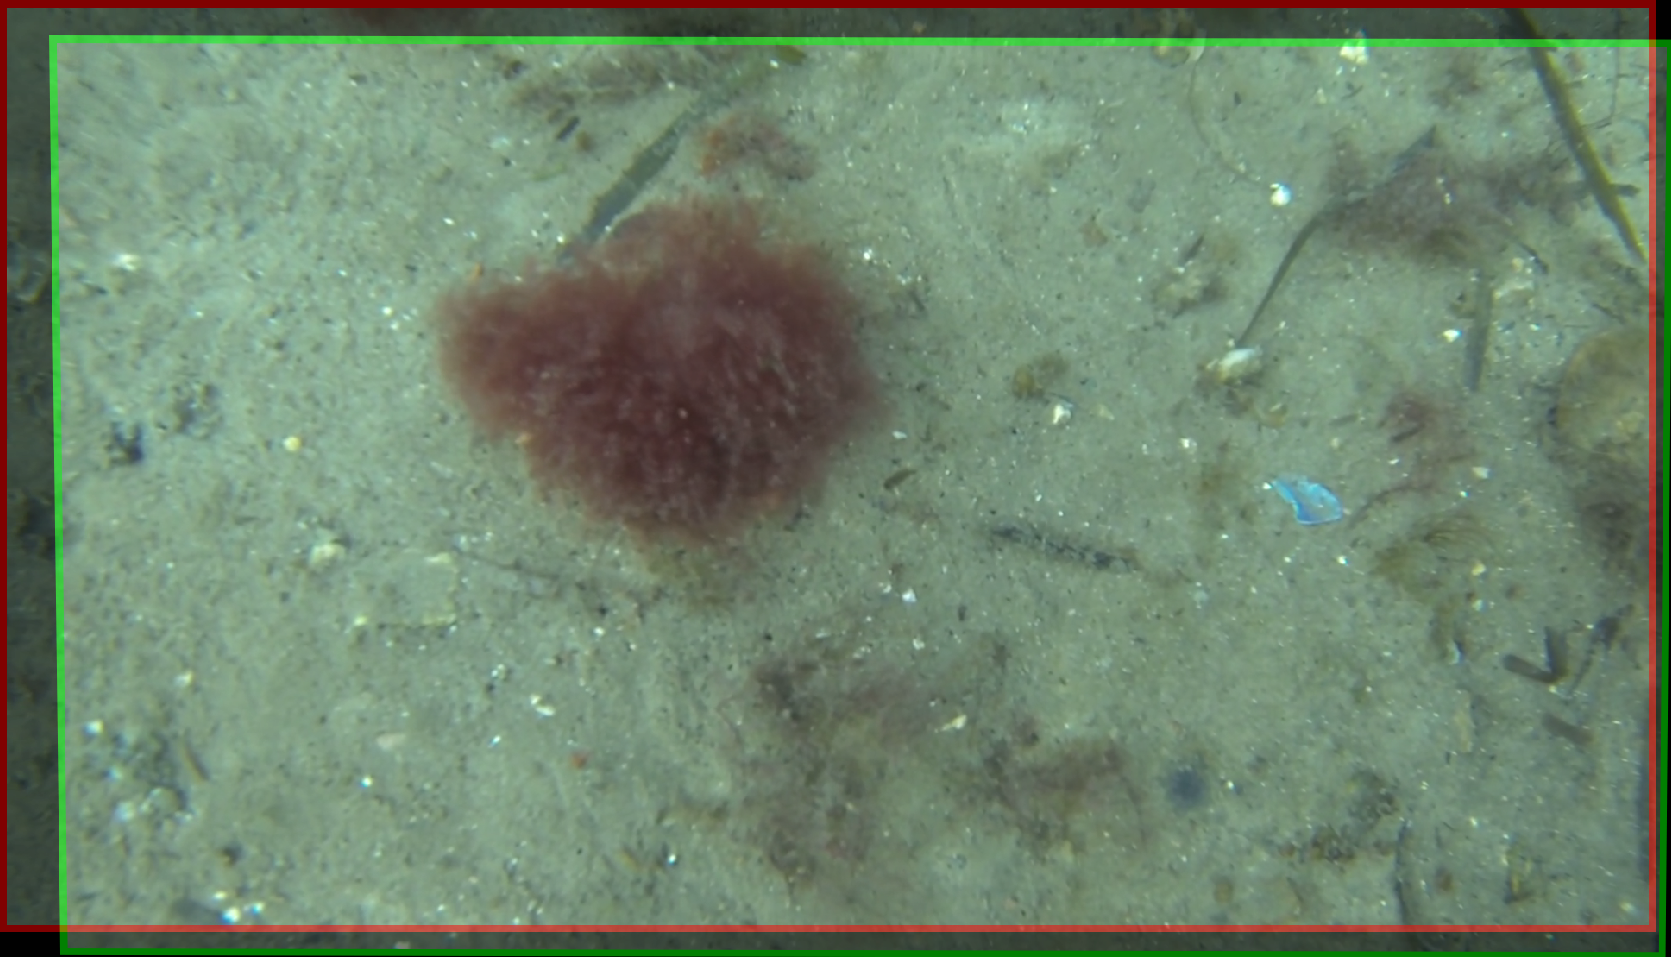
The camera may view something that does not have enough features to register a homography transformation to previous images.
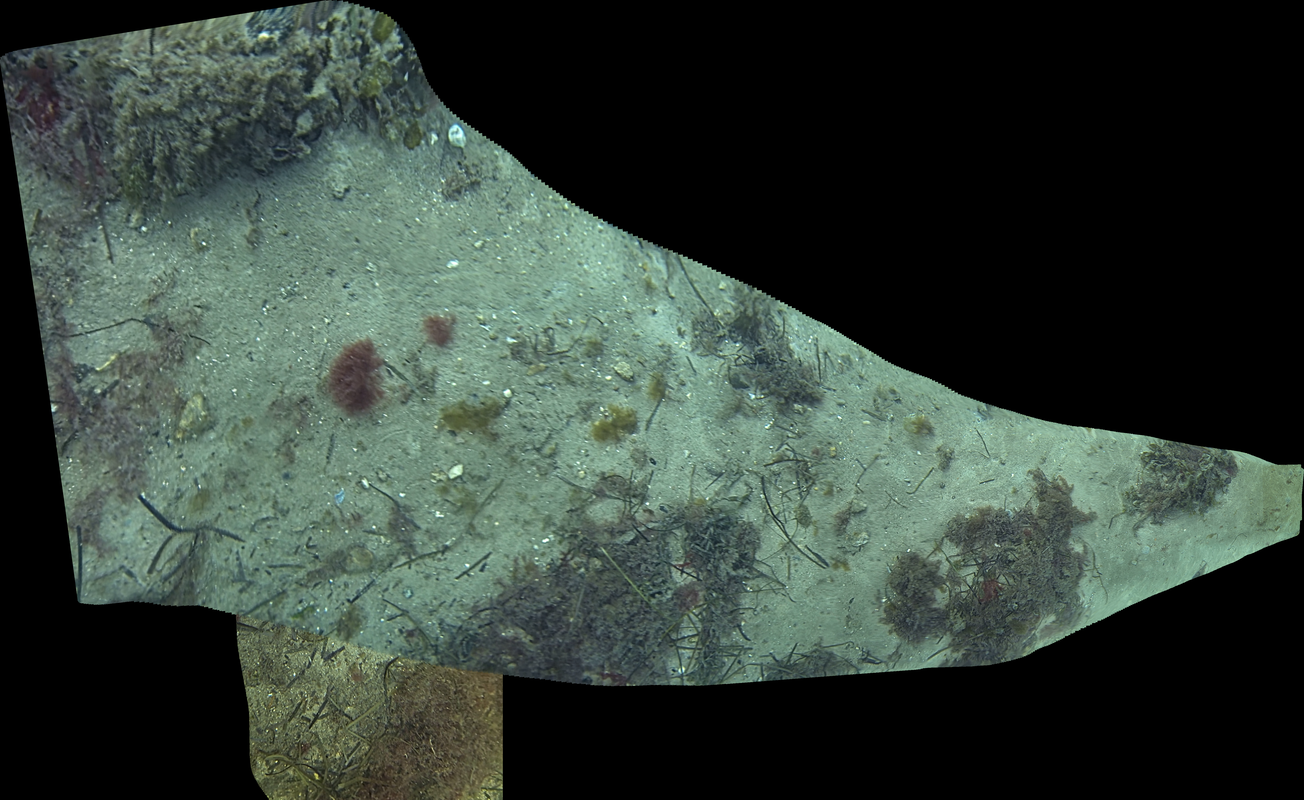
Mosaicking Result
Activities
Create your own video and see how large a mosaic you can create
What kind of camera control and survey works best?
Apart from color, contrast and lighting transforms, are there any geometric transformations that we could apply to get better results?
Some questions:
Do any parts of the mosaic appear poorer in quality than others? If so, why?
What happens when the camera passes over something that is not co-planar and quite large (for examples, a large boulder)?
What happens when a fish or other moving objects comes into view?
Calibration
It is useful in image geometry to know certain properties of a camera,
called the intrinsic properties. These properties are used to model the
behaviour of projecting 3D points onto a 2D image plane for the camera.
The model typically used is the “pinhole camera model”. These properties
are usually represented in the so-called “intrinsic matrix”, K. A
simple form (no skew) for K is shown below:
Where \(f_x\) and \(f_y\) are the focal lengths in the image coordinate frame x and y directions respectively, measured in pixels. \(c_x\) and \(c_y\) are the principle points in the image coordinate frame x and y directions respectively. Since focal lengths of cameras are generally reported in mm, the method for converting is as follows:
Where \(f\) is the focal length measured in mm, \(w\) is the image width in pixels, \(W\) is the sensor width in mm, \(h\) is the image height in pixels, and \(H\) is the sensor height in mm. Information on a variety of commonly used sensors are available here.
Additionally, the effects of the lens can distort the path of light
making objects that should be straight appear curved. These distortion
effects can be modelled, and the model parameters are usually referred
to as “distortion coefficients”, D. The number of coefficients
depends on the model selected.
mosaicking-calibration provides an implementation of OpenCV’s
calibrateCamera.
To calibrate a camera using this tool, you will need the following:
A camera calibration checkerboard sheet mounted to a stiff plate (see here)
The number of inner corner vertices (i.e. where the corner of a black square touches the corner of another black square) of the checkerboard (rows and columns)
The length of the side of the checkerboard squares in mm.
A video recording (about 60 - 90 seconds) taken by your camera of the checkerboard sheet at a variety of positions, orientations and scales, all interior corners need to be visible for a given video frame to have valid calibration data. Full coverage of the camera’s field of view is necessary to estimate distortion coefficients properly.
Run the calibration tool as follows:
mosaicking-calibration --cb_pattern number_of_cols number_of_rows --square_size side_length_mm --reduction_fraction 0.25 --model radtan path/to/your/calibration/video.mp4 output/calibration/path.json
The outputted calibration K and D matrices will be located in
the .json file.